
I will guide you through the process of creating this beautiful and textured stitch pattern. This article will help us master the art of seed stitch sewing.
Seed stitch, also known as rice stitch, is a popular hand embroidery stitch that can be used to create a variety of effects, from delicate textures to dense fillings.
It is a relatively easy stitch to learn, making it a good choice for beginners and experienced embroiderers alike.
Materials Needed
Before diving into our sewing project, gather the following materials:
- Fabric of our choice
- Sewing machine or needle and thread
- Scissors
- Ruler or measuring tape
- Yarn (if we’re opting for hand-sewing)
- Needle (for hand-sewing)
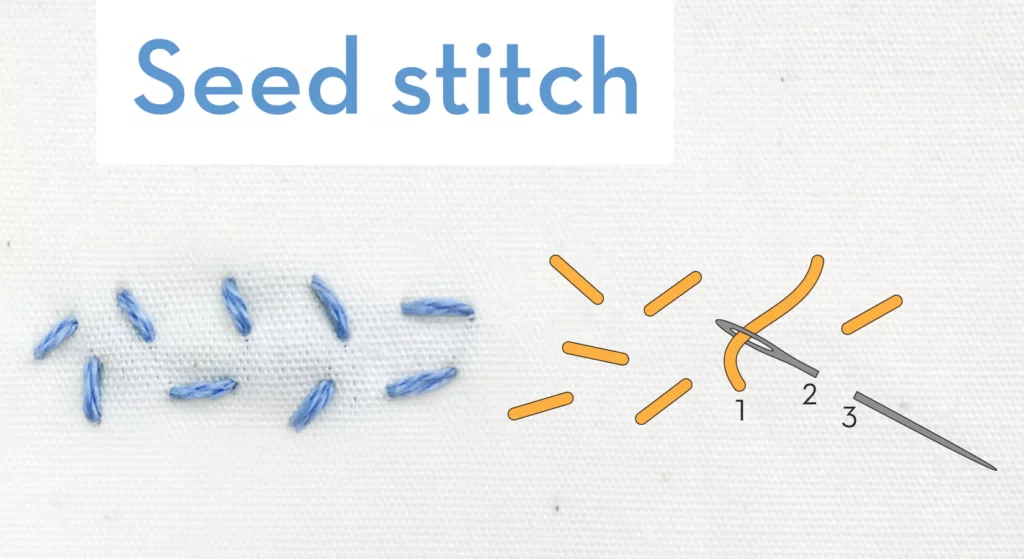
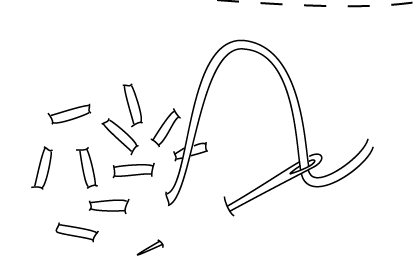
To sew a seed stitch, follow these steps:
- Bring your needle up through the fabric at the desired starting point.
- Take a small stitch, about 1/8 to 1/4 inch long, in any direction.
- Bring your needle back down through the fabric, a short distance away from the first stitch.
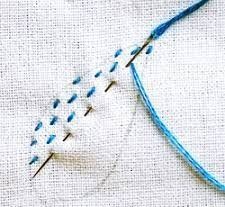
- Repeat steps 2 and 3, continuing to take small stitches in different directions.
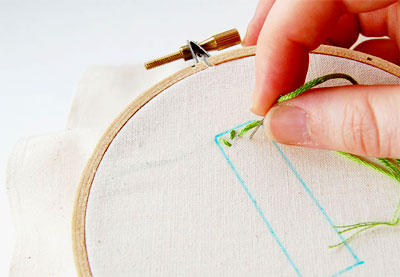
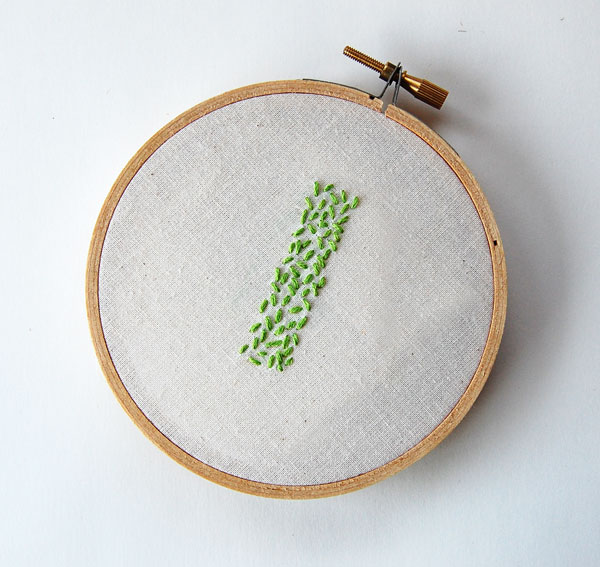
- Fill in the desired area with seed stitches, keeping the stitches close together to create a dense texture.
- Once we have filled in the desired area, tie off the thread on the back of the fabric.
What type of needle and thread should I use to sew a seed stitch?
We can use any type of needle and thread to sew a seed stitch. However, it is generally recommended to use a sharp needle and a thread that is slightly heavier than the thread you used to sew the fabric. This will help to create a strong and durable seed stitch.
How do I get the seed stitches to be even and consistent?
To get the seed stitches to be even and consistent, it is important to use a consistent stitch length and to keep the stitches close together. We may also want to use a thimble to help you push the needle through the fabric.
How can I use a seed stitch to create different effects?
Yes, we can be used to create various effects, depending on how we sew the stitches. For example, we can sew the stitches in different directions to create a textured effect, or we can sew the stitches close together to create a dense filling. we can also use different colors of thread to create a variety of patterns and designs.
Tips
- If we are new to sewing a seed stitch, it is a good idea to practice on a scrap piece of fabric before sewing on the project.
- When sewing a seed saw, it is important to keep the tension of the thread even. This will help to create a neat stitch.
- If we make a mistake, simply stop sewing and backtrack. Then, start sewing again from where we left off.
- Once we have finished sewing the seed saw, we may want to press the fabric on the back of the hoop to remove any wrinkles.
FAQ
What type of fabric can I use to sew a seed stitch on?
It can be sewn on a variety of fabrics, including cotton, linen, wool, and silk. stitch can be more difficult to sew on heavy fabrics, such as denim.
Can I use the seed stitch for embroidery?
Yes, we can incorporate the seed saw into our embroidery projects to add texture and dimension.
Is it necessary to use a sewing machine, or can I sew the seed stitch by hand?
Yes,We can sew the seed saw by hand using a needle and thread; no sewing machine is required.
What’s the best yarn for seed stitch?
Choose a yarn that matches our fabric and is comfortable to work with. Cotton and acrylic yarns are popular choices.
How long does it take to master the seed stitch?
The time it takes to master the seed stitch varies from person to person. With practice, we’ll improve our skills over time.
Can I use the seed saw for both knitting and sewing?
The seed saw can be used in both knitting and sewing, making it a versatile choice for various projects.
Conclusion
Seed stitch is a versatile and easy-to-learn embroidery stitch that can be used to create a variety of effects. Following the tips above, we can easily sew a seed saw and add a beautiful touch to our embroidery projects.